Makeup Frenzy Face Ideas: Smoky Eyes and Gothic Looks
Explore Makeup Frenzy face ideas with smoky eyes, gray lip combos, and gothic details. Build a themed Roblox look with blending tips and finishing touches.
Jump to
Makeup Frenzy Face Ideas for a Grayscale Look
Turn a black, white, and gray theme into a face with smoky eyes, sculpted cheeks, and a glossy gray lip. These Makeup Frenzy face ideas give you a clear design to follow when the round starts, so you can spend your time blending instead of choosing colors. Start your Makeup Frenzy face ideas with a white base, then build contrast through black contour, gray shadow, and a small white accent.
In Makeup Frenzy on Roblox, you create makeup looks, style your character, and compete in themed rounds. Players vote for their favorite looks, and you earn rewards. That makes the theme your starting point: a detailed face still needs to match the round’s instructions.
For the black, white, and gray theme, keep your makeup palette within those colors. Use the following combinations as design prompts, then adjust the placement and intensity yourself.
| Face idea | Eye makeup | Lip combination | Finishing detail |
|---|---|---|---|
| Smoky grayscale | Black shadow with gray inner corners | Gray lips with black liner | White lip gloss |
| Gothic contrast | Black smoky eyes and black wings | Gray lips with a defined black outline | Black brow stamps |
| Star accent | Black and gray shadow | Blended gray-and-black lips | White star beside an eye |
| Glitter accent | Smoky shadow with white inner-corner glitter | Gray lips with white gloss | Glowy eyeshadow finish |
These are variations on the same grayscale palette. Pick one detail to emphasize before you begin. For a star-accent face, leave enough space beside the eye for the shape. For a smoky face, spend your detail time on the transition between black shadow and gray inner corners.
Keep the rest of the look connected to that choice. A strong wing, dark brow, outlined lip, star, and glitter can all fit the design, but avoid giving every feature equally heavy edges. Let the eye makeup carry the drama and blend the lip outline more softly.
Build a White Base With Blended Black Contour
The foundation of these Makeup Frenzy face ideas is contrast. White establishes the grayscale canvas, black adds shape, and blending creates the gray transitions between them.
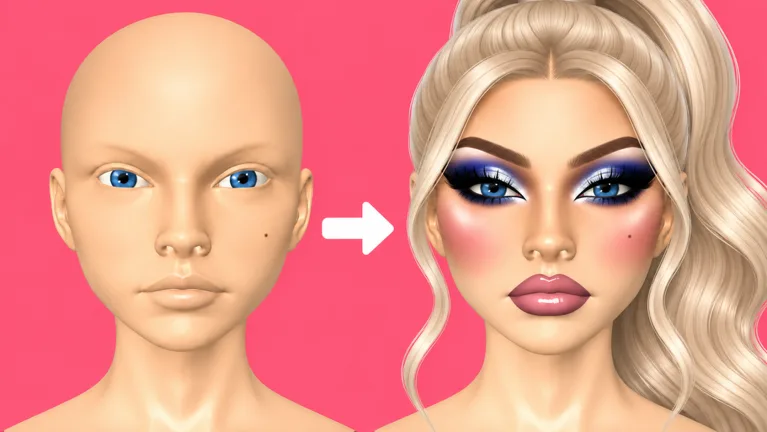 Image: Roblox / ciao kombucha fanclub
Start with the skin tone. For an entirely white head, cover the face, the back of the head, and the area beneath the chin. Rotate your view while checking those areas instead of judging the base only from the front.
Next, apply black contour around the cheeks and cheekbones. Blend it before adding more. Keep the darker color concentrated where you want definition, then soften its boundary against the white base.
| Stage | Color | Placement |
|---|---|---|
| Skin tone | White | Face, back of the head, and beneath the chin |
| Cheek contour | Black | Cheeks and cheekbones |
| Nose contour | Black | Along the nose |
| Concealer | White | Under the eyes, forehead, and chin |
| Blending | Existing colors | Edges between contour, concealer, and base |
Zoom in for the nose contour. Work in a smaller area than you used for the cheeks, then blend the dark marks before returning to the wider face view. Check whether the nose shading connects visually with the rest of the contour.
Add white concealer beneath the eyes, on the forehead, and on the chin. Blend those areas so the brighter sections sit smoothly beside the darker contour. Preserve some separation between light and dark; otherwise, the face can lose the contrast you were trying to create.
Adjust brush size to the feature you’re working on. Use broader strokes for larger areas and smaller strokes around the nose. Change blender strength as you work, checking the result after each adjustment.
Pause here and zoom out. Inspect both cheeks, the underside of the chin, and the forehead. Fix the base before moving into eyeliner and lip details, where smaller brushwork will take more attention.
Shape Smoky Eyes, Wings, and Brows
For smoky Makeup Frenzy face ideas, build the eyes from shadow to liner to brows. This gives each part a clear job: shadow supplies depth, eyeliner defines the shape, and brows frame the finished eye.
Apply black eyeshadow, then add gray toward the inner corners. Blend the transition so the colors connect without erasing the darker outer area. Keep checking both eyes from a wider view instead of finishing one completely before looking at the other.
Connect the wing before adding more detail
Zoom in and draw the eyeliner wing, then connect it to the rest of the liner. Reduce your brush size when the stroke becomes wider than you intended.
Avoid repeatedly extending the wing while the connection remains unfinished. Complete its basic shape first, inspect it, and then decide whether it needs more length or thickness. A small correction is easier to judge when the whole eye shape is already visible.
Time spent on eyeliner can crowd out the rest of the face. Finish a clear wing and move forward once it fits your design. Leave elaborate refinements until the lips and styling are in place.
Use brow stamps to frame the eyes
Makeup Frenzy includes brow stamps that you can resize. Choose black for the grayscale look, adjust the size, and check how the brows sit above the eyes.
Keep the brows in proportion to the shadow and wing. If they visually dominate the upper face, resize them before adding more eye decoration. Judge their placement from the full-face view as well as close up.
| Tool or adjustment | Action | Area to inspect |
|---|---|---|
| Eyeshadow brush | Apply black, then add gray toward the inner corners | Transition between the colors |
| Beauty blender | Soften the shadow edges | Upper and outer shadow boundaries |
| Eyeliner brush | Reduce the size for detailed strokes | Wing and its connection |
| Brow stamp | Adjust the stamp size | Brows above both eyes |
| Zoom | Move between close and full-face views | Detail placement and overall balance |
Add lashes after establishing the shadow and eyeliner. Check whether the eye shape remains visible beneath them.
For a brighter accent, use white glitter at the inner corners. Makeup Frenzy also includes a glowy eyeshadow finish. Keep that brightness concentrated around the eye detail you want to emphasize rather than spreading it across every dark section.
Create Gray Lip Combos and Place Your Accents
Gray lips with black liner bring the same light-and-dark structure from the eyes to the lower face. They also give you another place to use blending without introducing color into a grayscale round.
Fill the upper and lower lips with gray. Then outline them in black, checking the edges as you work. Reduce the blender’s size and strength before softening the outline into the gray fill.
Keep the blending focused near the border. Preserve a visible gray center while smoothing the transition from the darker liner. Zoom out before adding gloss so you can assess the lip shape alongside the eyes.
Apply white lip gloss as the finishing layer for this combination. Inspect the entire face again: if the lips draw more attention than you intended, soften the outline before adding further decorations.
For Makeup Frenzy face ideas with a star accent, place a white star beside an eye. Treat it as a deliberate part of the composition. Check its position relative to the wing, brow, and nearby hair so those details remain readable.
Shape access has a purchase consideration: the Shape Stencils pass permanently unlocks shape stencils. Build the smoky eyes, contour, and lip combination first, then include the star when you have access to that feature.
Use these checks while finishing the face:
- Keep the eye, lip, and contour colors within the grayscale theme.
- Blend the black lip border while retaining the gray fill.
- Inspect the star beside the finished eyeliner.
- Keep inner-corner glitter focused on the eye area.
- Zoom out after each finishing detail.
Hair completes the presentation. Choose a style, then adjust its position forward or downward as needed. Inspect how it sits around the face before considering the look finished.
Pay attention to the hairline and the areas around the eyes. Recheck the hairstyle during presentation, too; hair can appear to pass through the head. Keep your final styling inspection focused on placement as well as appearance.
Finish the Round and Understand Optional Passes
Organize your Makeup Frenzy face ideas around a complete face before spending the remaining time on decoration. Establish the base, finish the main eye and lip shapes, position the hair, and then add your chosen accent.
Follow this order during a grayscale round:
- Apply the white skin tone and check the head from different angles.
- Add black cheek and nose contour, then blend.
- Place and blend white concealer.
- Finish black-and-gray shadow, connected wings, brows, and lashes.
- Complete gray lips, black liner, and white gloss.
- Position the hair and add glitter or a shape accent.
Once those steps are complete, review the theme again. During a black, white, and gray round, inspect every makeup color you selected. Remove a stray color choice before spending more time refining a tiny detail.
Players vote on the finished looks. Keep your own voting focused on the round’s theme, visible makeup work, and the overall presentation. Your design does not need every available effect to communicate its idea.
Optional passes expand particular features. These prices and benefits apply to Makeup Frenzy on Roblox as of October 13, 2026.
| Game pass | Price | Included benefit |
|---|---|---|
| VIP | 349 Robux | VIP makeup tools, voting backgrounds, and three daily theme choices |
| Second Hair Slot | 79 Robux | Permanent access to a second hair slot |
| Shape Stencils | 119 Robux | Permanent access to shape stencils |
| My Lookbook - Unlimited Slots | 139 Robux | Unlimited saved-look slots |
Match a purchase to the feature you actually want. Choose Shape Stencils for designs built around shapes, or the Second Hair Slot when you want that additional styling slot. The Lookbook pass concerns saved-look capacity, while VIP includes its own tools, backgrounds, and theme choices.
Before the presentation, give your face a final inspection. Check the contour edges, eyeliner connections, lip border, and hair placement. For these Makeup Frenzy face ideas, the finishing goal is a readable grayscale design with a clear focal detail.
FAQ
What Makeup Frenzy face ideas can I use for a black, white, and gray theme?
Build a white base with blended black contour, black-and-gray smoky eyes, and gray lips outlined in black. Add white gloss, inner-corner glitter, or a white star beside an eye to personalize the design.
How do I soften black contour and lip liner?
Use the beauty blender along the edges. For lips, reduce the blender’s size and strength before blending the black outline into the gray fill. Zoom out between adjustments to inspect the whole face.
Does Makeup Frenzy have eyebrow presets?
Yes. Makeup Frenzy has brow stamps that you can resize. Select black brows for a grayscale look, then adjust their size and inspect their placement above the finished eye makeup.
How much does the Shape Stencils pass cost?
The Shape Stencils pass costs 119 Robux as of October 13, 2026, and permanently unlocks shape stencils for your makeup looks. Finish your base, eyes, and lips before placing a shape accent.
Continue with
 Makeup Frenzy Faces Roblox: How to Create Standout LooksMakeup Frenzy faces roblox: learn to blend contour, shape brows, create smoky eyes, and finish a grayscale look. Build your themed face with confidence.
More in Looks
Makeup Frenzy Best Looks: Smoky Eyes and Gothic Glam
Explore Makeup Frenzy best looks with grayscale glam, smoky eyes, blended lips, and styling tips. Build a cohesive face for your next themed Roblox round.
Makeup Frenzy Makeup Looks: Smoky Eyes and Style Tips
Create Makeup Frenzy makeup looks with smoky eyes, gray lips, and polished styling. Follow a monochrome tutorial and learn how to finish themed rounds.
Makeup Frenzy Style Ideas: Smoky Eyes and Gothic Glam
Explore Makeup Frenzy style ideas with smoky eyes, grayscale lips, and gothic details. Make a themed look, blend cleanly, and finish before the round ends.
Makeup Frenzy Winning Looks: A Guide to Themed Rounds
Create Makeup Frenzy winning looks with a grayscale makeup walkthrough, blending tips, smarter round planning, and a clear guide to optional Roblox passes.
Join the community
Official channels for news, updates and player help: