Makeup Frenzy Perfect Look Guide: Polish Every Round
Use this Makeup Frenzy perfect look guide to match themes, blend contour, refine eyeliner, and finish your Roblox makeup before the round ends. Start here.
Jump to
How to Create a Polished Look in Makeup Frenzy
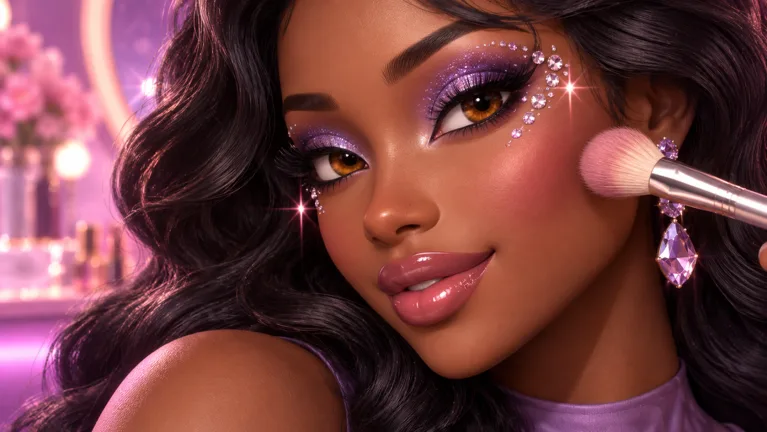
A sharp eyeliner wing loses its impact when the rest of your face is unfinished. This Makeup Frenzy perfect look guide helps you build a complete, coordinated look before the round ends. Use this Makeup Frenzy perfect look guide to match the theme, soften your contour, and leave enough time for lips, lashes, and hair.
Makeup Frenzy combines makeup creation, character styling, themed competitions, and player voting. Your goal is to make the theme readable across the entire look. Start with a clear palette, build the main features, and add decorative details after the face is complete.
Turn the Theme Into a Palette
For a black, white, and gray theme, carry those colors through your makeup and eye color. A gothic interpretation fits that palette, but you can also create softer grayscale makeup by reducing the contrast between your contour, eyeshadow, and lips.
Use this combination to plan a monochrome look:
| Feature | Color combination |
|---|---|
| Base | White |
| Cheek and nose contour | Black, blended into the base |
| Concealer | White |
| Eyeshadow | Black with gray inner corners |
| Brows and eyeliner | Black |
| Lips | Gray fill, black liner, white gloss |
| Eye color | Gray |
| Optional decorative accents | White star and white glitter |
These colors form a specific look, rather than a required formula for every round. Adapt your choices to the current theme instead of repeating the same makeup automatically.
Before painting, decide which feature will carry the look. Choose smoky eyes if you want dramatic eye makeup, then keep the decorative accents small. For a strong lip combination, give the mouth enough attention before spending the remaining time on glitter.
Keep the central lesson of this Makeup Frenzy perfect look guide in mind: finish the whole face before polishing its smallest details. Player voting follows the themed round, so make your concept easy to understand when your character appears.
Build the Base With Controlled Contour and Blending
Set the base color before adding contour. For the monochrome example, apply white across the face and check the back of the head and underneath the chin. Rotate your view as you work so those areas receive attention too.
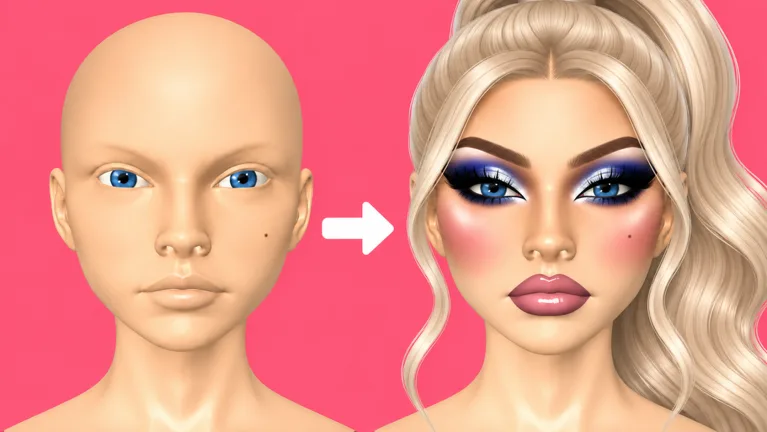 Image: Roblox / ciao kombucha fanclub
Next, apply black contour around the cheeks and cheekbones. Blend it into the white base before moving to the nose. Keep the dark placement controlled; dragging a strong contour color too far across the face can overwhelm the lighter areas.
The tool controls deserve as much attention as the color picker:
| Tool or control | Use during the look |
|---|---|
| Brush size | Adjust the area covered while painting |
| Strength | Adjust during application and blending |
| Beauty blender | Soften contour, concealer, eyeshadow, and lip transitions |
| Zoom | Move closer for nose contour, eyeliner, and lip edges |
| Undo | Remove an application when the selected color looks wrong |
Shape the Nose Without Losing the Base
Zoom in before applying nose contour. Keep your placement narrow, then blend the dark color into the surrounding base. Zoom back out to judge the effect alongside the cheeks.
Check the face as a whole instead of judging each mark at maximum zoom. A contour that looks subtle up close can read much more strongly when you see the full character.
For the white concealer stage, work underneath the eyes, across the forehead, and on the chin. Blend those areas before starting the eyes. Keep the light and dark sections distinct enough to give the face dimension, while softening their boundaries.
Adjust One Control at a Time
If a stroke spreads too widely, reduce the brush size before continuing. If the application feels too strong, lower the strength and reassess. Avoid changing the color, size, and strength together when you are trying to correct one problem.
In this Makeup Frenzy perfect look guide, blending is part of each stage. Blend the cheeks before contouring the nose, and blend the concealer before drawing eyeliner. That sequence keeps a growing list of unfinished corrections from following you through the round.
Create Smoky Eyes, Clean Wings, and Balanced Brows
Once the base is ready, build your eye makeup around the theme. For the grayscale look, apply black eyeshadow to the lids and gray toward the inner corners. Blend the transition so the two shades connect smoothly.
Keep checking both eyes at the full-face view. Match the overall shape and intensity before adding extra effects. A small difference in shadow placement becomes easier to spot when you stop focusing on individual brush strokes.
Draw the Wing, Then Connect It
Zoom in and reduce your brush size before drawing eyeliner. Form the wing, then connect it toward the front of the eye. Keep the line deliberate rather than repeatedly widening it while trying to fix the edge.
Use this sequence:
- Finish the eyeshadow placement.
- Blend the black and gray transition.
- Draw the eyeliner wing.
- Connect the wing to the rest of the liner.
- Zoom out and compare the eyes.
Eyeliner can consume the time you need for the rest of the character. Once the wings communicate the shape you want, move to brows and lips. Return for refinements only after those features are complete.
Use Brow Stamps to Establish the Shape
Makeup Frenzy includes brow stamps with size adjustment. For the monochrome look, choose black brows and adjust the stamp size to suit the face.
Judge the brows together with the eyeshadow. If both features are visually heavy, reduce the brow size instead of adding more makeup around them. Give the eye area enough space for the wing and lashes to remain visible.
This Makeup Frenzy perfect look guide prioritizes a finished eye area over endless eyeliner corrections. Add lashes after establishing the shadow, liner, and brows, then check whether each feature still has a clear shape.
Set the eye color to gray for a fully coordinated monochrome design. If you add white glitter at the inner corners, keep its placement small so the black-to-gray shadow transition remains visible.
Finish the Lips and Style the Character
Complete the lips before treating the look as ready. A finished eye area paired with unfinished lips leaves part of your design unresolved.
For the grayscale combination, fill both lips with gray, outline them in black, soften the transition, and add white gloss. Check the color on the face as you apply it. Use undo if the result is different from what you intended, then choose the replacement shade.
| Lip stage | Action |
|---|---|
| Fill | Apply gray to the upper and lower lips |
| Outline | Trace both lips with black liner |
| Blend | Reduce blender size and strength, then soften the transition |
| Finish | Add white lip gloss |
Keep the blender small around the mouth. Work along the boundary between the liner and fill instead of sweeping across a large area. Preserve enough of the darker outline to frame the gray center.
Zoom out before adding more gloss. Check whether the lips balance the smoky eyes and strong brows. If the mouth already reads clearly, move on to styling.
Add Hair Before the Last Decorative Touches
Open the style options and choose hair that suits the character. Adjust its position, then inspect how it sits around the head and face.
Check whether the hairstyle covers the brows, hides the eyeliner wings, or intersects awkwardly with the head. Make positioning changes while you still have time to view the complete character.
Hair clipping can appear during the presentation even after the editing view looked different. Keep the hairstyle placement simple, and inspect the preview carefully before spending your remaining time on decorations.
For this Makeup Frenzy perfect look guide, accents come after the major features. If you have access to shape stencils, place a small white star near the eye. Add white inner-corner glitter only after the lips, lashes, and hair are ready.
Treat each accent as a finishing choice. Keep it only if it supports the theme and leaves the underlying makeup easy to see.
Manage the Round and Choose Extras With a Purpose
Build a repeatable order so you spend less time deciding what to do next. Work through the base, contour, concealer, eyes, brows, lips, lashes, and hair. Reserve the final stretch for checking the character and adding optional accents.
Before the round ends, run through this checklist:
- Check the back of the head and underneath the chin.
- Compare the eyeshadow and eyeliner on both eyes.
- Inspect the upper and lower lip edges.
- Check hair placement around the face.
- Remove colors that clash with the theme.
- Stop adding details once the look feels complete.
During voting, assess how clearly each look follows the theme and how its features work together. Keep theme adherence separate from your personal preference for a particular hairstyle or makeup style.
Understand What the Game Passes Add
As of October 13, 2026, Makeup Frenzy offers these passes:
| Game pass | Price | Included features |
|---|---|---|
| VIP | 349 Robux | VIP makeup tools, voting backgrounds, and three daily theme choices |
| Second Hair Slot | 79 Robux | A permanent second hair slot |
| Shape Stencils | 119 Robux | Permanent access to shape stencils |
| My Lookbook - Unlimited Slots | 139 Robux | Unlimited saved-look slots |
Match a purchase to the feature you want to use. Choose Shape Stencils for stencil designs, or Second Hair Slot when you want to combine hair pieces. Keep your spending focused on those specific additions.
Apply the technique in this Makeup Frenzy perfect look guide before expanding your tool choices: control brush size, blend each stage, and finish the main features. Extra styling options give you more choices; your palette and application still determine how those choices fit together.
Ready to build your next look? Play Makeup Frenzy on Roblox and practice completing a coordinated face before adding the final decorative touch.
FAQ
What should I focus on in the Makeup Frenzy perfect look guide?
Match the theme across the entire character, blend contour and concealer as you go, and finish the eyes and lips before adding decorations. Check the full face regularly so detailed work stays balanced.
How do I create a black, white, and gray look?
Use a white base, blended black contour, white concealer, and black eyeshadow with gray inner corners. Add black brows and eyeliner, gray eyes, and gray lips finished with black liner and white gloss.
How can I keep eyeliner from taking the whole round?
Zoom in, reduce the brush size, draw the wing, and connect it. Move on once the shape is readable. Finish brows, lips, lashes, and hair before returning for smaller eyeliner corrections.
What does the Shape Stencils pass unlock?
Shape Stencils costs 119 Robux as of October 13, 2026, and permanently unlocks shape stencils for your makeup looks. Use stencil accents after completing the main makeup so the decoration supports the finished design.
Continue with
 Makeup Frenzy vs Makeup Mania: Which Roblox Game Wins?Makeup Frenzy vs Makeup Mania: Compare makeup tools, themed rounds, presets, and Robux passes, then learn how to finish a look before the timer runs out.
More in Guide
Makeup Frenzy Guide: Better Looks for Themed Rounds
Use this Makeup Frenzy guide to build themed looks, blend makeup, style hair, and understand game passes. Learn to finish your look before voting starts.
Makeup Frenzy How to Play: Beginner Tips for Each Round
Learn Makeup Frenzy how to play, from brush controls and blending to themed rounds, styling, and voting. Build a complete look before the timer runs out.
Join the community
Official channels for news, updates and player help: